Everything, Free Sewing Patterns & Tutorials, Sewing Projects & Patterns
Free Halloween Pattern: Rest in Peas Baby Bib
Halloween is the holiday that is probably the most full of possibilities when it comes to creative sewing projects. When I was a kiddo and beginning to have some interest in learning to sew it was because I watched my mom get absolutely sucked into creatively solving how to make a headless ghoul costume for my little brother one year. An old button up of my dad’s, some glitter mesh and pool floaties eventually became an amazing costume that not only did my brother wear but I think got passed around to at least half a dozen families over the years! I wish I could find a photo, but currently those things are packed away while my mom moves house. I’ll always be grateful that she’s the one who started me on my sewing journey!
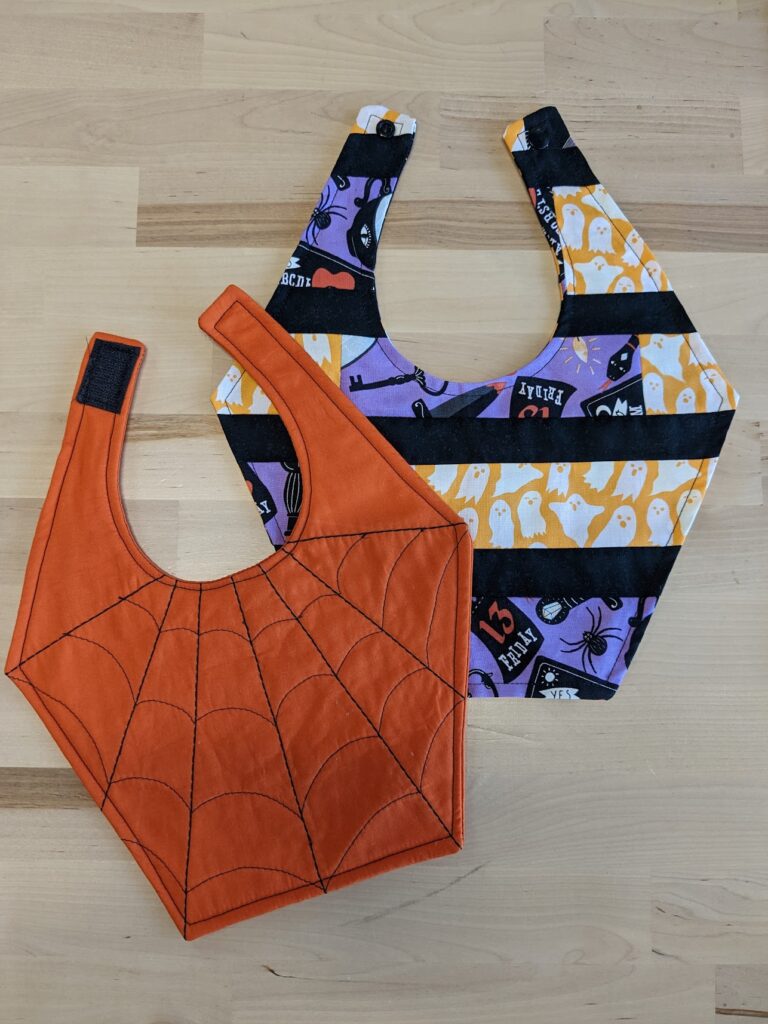
So here’s a weird little one for the parents out there: a spider-web/ tombstone shaped baby bib pattern! We made a spooky spider web version with some fun topstitching (template included in that download) as well as a really fun scrappy version if you’re hoping to use up a bunch of scraps.
(free!) Rest in Peas Halloween Baby Bib PDF Pattern
Now, because this is free and Halloween is only a few days away, I decided to keep it simple for the tutorial so we can get this out there! But, if you’re learning to sew and finding you need some help translating some of the lingo we use or maybe are looking for other tutorials to help you build your skills, it would be awesome if you checked out the beginner friendly PDF patterns I offer in the shop. Those are paid patterns, but I worked hard to make them as easy to follow as it would be if you had a sewing teacher (like me!) by your side.
Halloween Fabrics in the Shop:
-
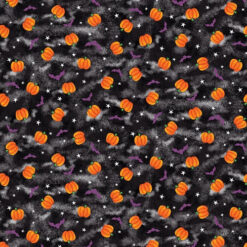 Halloween Tossed Pumpkins and Bats in Black$13.50
 -
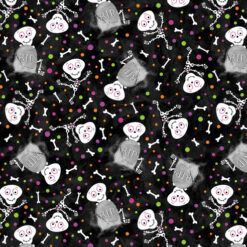 Halloween Tossed Skeletons in Black$13.50
 -
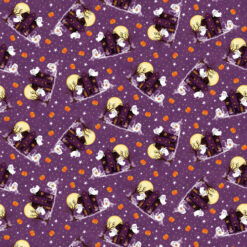 Halloween Tossed Houses in Plum$13.50
 -
Product on sale
 Halloween Tiny Frights Floral in BlackOriginal price was: $13.00.$6.00Current price is: $6.00.
Materials Needed and Getting Started:
To make this bib, you need:
- Spiderweb version:
- 1 Fat Quarter of solid or semi solid Quilting Cotton or Cotton Flannel to use for the front.
- 1 Fat Quarter of Cotton Fabric for the back.
- Basic bib, no spiderweb:
- 1 Fat Quarter of Cotton Fabric for the front and back. Can be quilt cotton or flannel. Bonus points for Halloween themed fabric!
- Scrappy Bib: piece together a 12” x 14” piece for the front and have 1 Fat Quarter of fabric for the back. You can do this with squares or strips, or a combo of the two techniques like ours!
- All versions: a 12” x 14” piece of flannel or scrap cotton batting (for absorbancy & decorative quiting, but can be omitted if your baby isn’t drooly)
- Thread in a fun color to do the topstitching .
- Marking tool for drawing on fabric, we love Frixion Pens and markers here!
- Optional: Spray glue for basting. We like Spray & Bond Brand at our store.
- Snaps, I love KAM snaps as they are CPSIA compliant (safe for baby stuff) and here’s the Etsy Shop I use! or a 1” piece of Velcro.
- Scissors
- Pins
- Sewing Machine
Once you’ve downloaded your pattern you have to open it in a PDF viewing program like Adobe Acrobat you will print it at 100% or Actual Size in order to print it at the right scale. Check the 2” box I included on the pattern. While it doesn’t seem important – you do want this to fit baby’s neck!
Constructing the Bib:
In this tutorial I am demonstrating the construction on the Spider Web bib, if you’re going to make a solid bib or scrappy version, you can skip to the * and get to constructing your bib.
You will cut 2 pieces of fabric on the fold to make your bib. These are the front and the back.
Cut your absorbent layer of choice to 12” x 14” .
Layer the top fabric wrong sides together with the absorbent layer. Glue baste or pin so they stay together for the decorative stitching we’re about to embark on!
Using your marking tool, freehand draw (or use the included template) to make your spiderweb.
Thread your machine with your fun colored thread. To give regular Sew All thread the look of embroidery/topstitch thread use the reinforced straight stitch if your machine has one and up the stitch length to 4 or 5. I did find it was hard to use this stitch on the curved lines so I switched back to a regular, but you could even experiment with a narrow zig zag! stitch.
Stitch the spiderweb design through your top layer and absorbent layer. Trim all threads.
*Trim excess absorbent layer to the edge of your top fabric.

If using Velcro, sew the hook side piece to the top of the bib on the left side, a 1/2” from the edge. Sew the loop side to the back fabric left side 1/2” from the edge.

Place your front and back fabric pieces right sides together and pin to sew all the way around. Leave a small hole at the upper outer edge as indicated.


Sew all the way around, pivoting at corners and backstitching at beginning and end.
Clip corners and into the curve around the neck. Grade (aka, trim down) the absorbent layer to be a bit shorter to reduce bulk.
Turn your bib right side out and use something pointy like a chopstick to poke out all the corners. Press well, hiding the hole as best you can. Topstitch all the way around at 1/8”-1/4” from the edge.

If using snaps, add snap 1/2” in from the end (about same position as the Velcro earlier). You can add a second snap a 1/2” away from that if you please to make the bib adjustable. Make sure they are facing one another!

If you use our pattern and like to share to social media, make sure to tag me at @julia_oldspoolnj on Instagram!